September 28, 2017

Fall Porch Ideas


Here are a few things you can bring outside to add to your fall displays.


Pile up some warm wool blankets to wrap up in on those chilly days.


Add some pumpkins for colour.


Fill an old tool box with some fall asters, gourds, ornamental peppers, and decorative kale.


Build a tower of pumpkins.  
I used a wire obelisk that I had in the garden.  It was easy to pass the pumpkins and gourds through the open wires.  
There are wires on the bottom of the obelisk to stick into the ground.  This prevents the tower from toppling over.


Some of the pumpkins and gourds are sort of wedged in so that they don't fall out. 
I used a pot which had flowers still blooming.  Some of the plants had already died off in the middle, so it was a convenient place to place the tower.

My original plan was to use a tomato cage for the tower, but, the wires are not close enough together to keep the pumpkins from falling out.


Fill a flower box with fall mums, ornamental peppers, and a croton which was left over from summer.  I left the plants in their pots and placed them into the window box.  I then added some small squash and gourds.


I try to re-use whatever plant material I can and work it into my display. 


I also used a few potted mums for added colour.


As much as possible, I stuck to my colour scheme of purple and orange with a little white and green.


Decorating outside the home in fall is fun and you can extend the growing season by filling in some bare areas with fall plants.


Thank you for stopping by.


This is a Fair Meadow Place Original Publication.


We are Linking With...
Funtastic Friday
Feathered Nest Friday
Pink Saturday
Create & Celebrate
The Best of the Weekend
You're the Star
Merry Monday Link-Up
Between Naps on the Porch
Tuesdays With a Twist
Celebrate Your Story
The Scoop
Inspire Me Tuesday
Wonderful Wednesday
Wow Us Wednesday
Ashley and Laurie's Link-up
The Pin Junkie
Wonderful Wednesday


The best way to see our posts is by email subscription. SUBSCRIBE HERE.


You can find us on PINTERESTFACEBOOKGOOGLE PLUS


It really makes our day when we hear from you so please leave comments below. 
You can also use the Contact Form to contact us by email. Messages sent by email are private messages that will not be posted on the Blog.

September 21, 2017

Set the Table - Fall Brown & White Transferware


Set the Table - Fall Brown & White Transferware


Transferware is a decorative process started in England in the mid-18th century.  It involves engraving copper plates.  The prints are transferred from the copper plates onto tissue paper.  The tissue then transfers the wet ink onto the ceramic piece.

The patterns are quite beautiful, often depicting life during the 18th century.

There is nothing quite so diverse as using transferware in table decorating.

Brown & White transferware is no exception.

Transferware is easily adaptable to different themes and different seasons.


Set the Table - Fall Brown & White Transferware


Apart from having an all-over design or picture, the rims of the plates are often decorated with interesting design flourishes.


Set the Table - Fall Brown & White Transferware


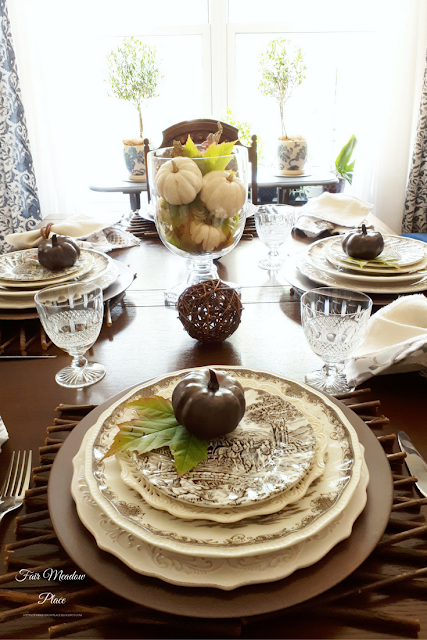
The overall place setting starts with a lattice placemat.  We made these from wooden lattice purchased at the dollar store and then cut each one in half using garden secateurs.  We got two placemats from each section of lattice.

The chargers were once gold and have been painted.

The white plate on top of the charger is Antique Scroll from Pier 1 Imports.

The dinner plate is a pattern called Shakespeare's Sonnets by Kensington Stafford and you can see them HERE

The quote on the back of the plate reads "How like a winter hath my absence been from thee, the pleasure of the fleeting year."  
The picture on the plate is Anne Hathaway's Cottage.

The creamy-coloured plate I use quite often for its interesting rim.  It is by Coastline.

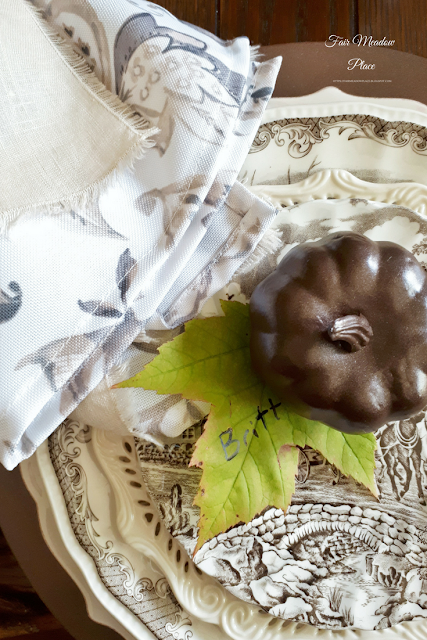
The brown and white plate on top of the stack is Myott "Royal Mail".


Set the Table - Fall Brown & White Transferware

The pumpkin is plastic and I painted it to match the charger.

You can find the same paint I used for both the pumpkins and chargers. SOURCE


Set the Table - Fall Brown & White Transferware


The napkins were doubled.  The top napkin is linen and instructions to make them are HERE.

The napkin underneath is by Hay Market.


Set the Table - Fall Brown & White Transferware


Set the Table - Fall Brown & White Transferware


Set the Table - Fall Brown & White Transferware


Crystal is by Waterford and was a gift from a friend.


Set the Table - Fall Brown & White Transferware

I used a crystal hurricane to stack Baby Boo pumpkins interspersed with leaves.


Set the Table - Fall Brown & White Transferware


Set the Table - Fall Brown & White Transferware


 Each place setting has a single leaf with the name of the guest written on it and held in place by a painted pumpkin.


Set the Table - Fall Brown & White Transferware


 Cutlery is from Bombay Co.


Set the Table - Fall Brown & White Transferware


Set the Table - Fall Brown & White Transferware


Set the Table - Fall Brown & White Transferware


I hope I have inspired you to look for transferware.  Some of my pieces I have had for a number of years.  I often see them in thrift stores or you can purchase them new.  There are s any interesting patterns and a variety of colours.


Thank you for stopping by.


 This is an original Fair Meadow Place Publication.


We are Sharing With....
Between Naps on the Porch
Feathered Nest Friday
Foodie Friday and Everything Else
Funtastic Friday
The Scoop
Inspire Me Tuesday
Make It Pretty Monday
Celebrate Your Story
You're the Star
Tuesdays With A Twist
Wonderful Wednesday
Wow Us Wednesdays
Share Your Style
Create & Celebrate
The Best of the Weekend


The best way to see our posts is by email subscription. SUBSCRIBE HERE.


You can find us on PINTEREST, FACEBOOK, and GOOGLE + 

It really makes our day when we hear from you so please leave comments below. 

You can also use the Contact Form to contact us by email. Messages sent by email are private messages that will not be posted on the Blog.


September 14, 2017

Set the Table - A Canadian Thanksgiving


Set the Table - A Canadian Thanksgiving


Canadian Thanksgiving holiday is always the 2nd Monday in October.


Set the Table - A Canadian Thanksgiving


It is a day to give thanks for a bountiful harvest.  It is a day to share with family and friends.  It is a day to stuff ourselves with as much of that harvest as we can.

Typically, and depending on culture, of course, we may start with a soup course made from perhaps carrots or pumpkin followed by a salad.

The main course will be roasted turkey, chicken, or, if we are lucky, pheasant, or wild turkey.  It could also be a roasted venison, beef, or ham or any combination of the above.  

The meat or poultry is accompanied by fresh vegetables, broiled, boiled, roasted, mashed, or raw and, as often as not, with rich, cheesy sauces poured over them.

If you can make it through all that there is dessert, but, more on that later.


Set the Table - A Canadian Thanksgiving


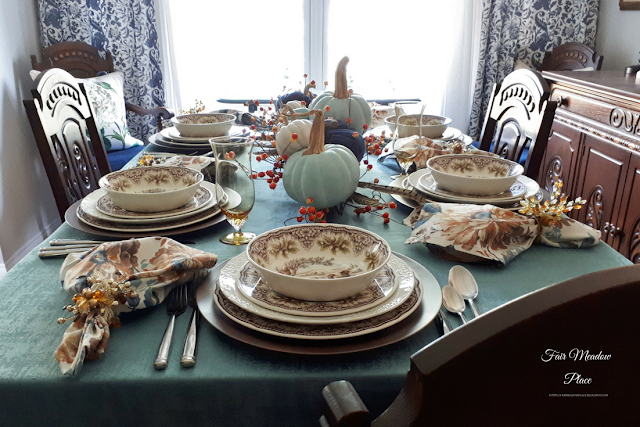
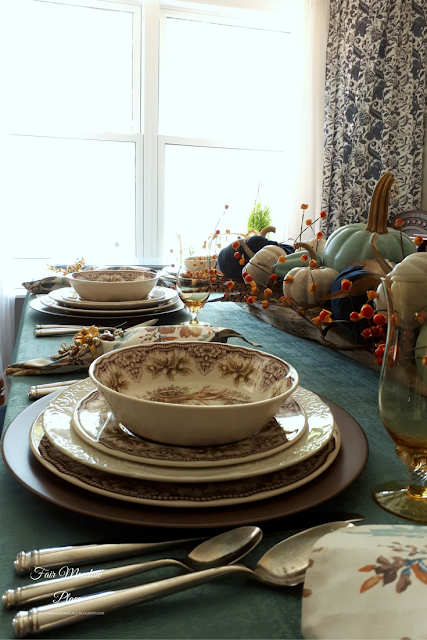
As the base of the table setting, I chose a turquoise tablecloth.  

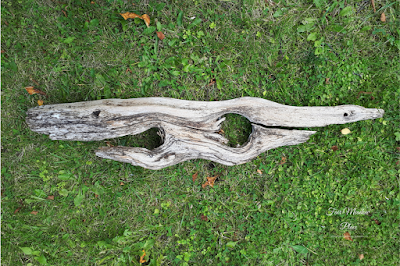
For the centrepiece, I started with an old piece of cedar rail fencing I found when rummaging around at the farm.   The rail fences are original to the farm and very old.  The cedar rails will last many, many years.

I cleaned it up with water and a scrub brush.  I liked the rustic patina, so once it dried, I did nothing to it.

It is approximately two feet in length and six to eight inches wide.


Set the Table - A Canadian Thanksgiving


It is the perfect size for the centre of the table.


Set the Table - A Canadian Thanksgiving


On top of the rail, I placed some faux bittersweet and then some faux chalk painted pumpkins and velvet pumpkins.

You can see how I made the velvet pumpkins HERE


Set the Table - A Canadian Thanksgiving


The pumpkins were randomly placed wherever they would fit along the rail.


Set the Table - A Canadian Thanksgiving


We had a few pheasant feathers that were placed under the pumpkins.

It was an easy, fuss-free centrepiece.


Set the Table - A Canadian Thanksgiving


Set the Table - A Canadian Thanksgiving


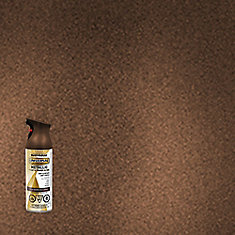
For the plates, I started with gold chargers that I spray painted with a metallic paint.  I left a link at the bottom of the post for the paint.

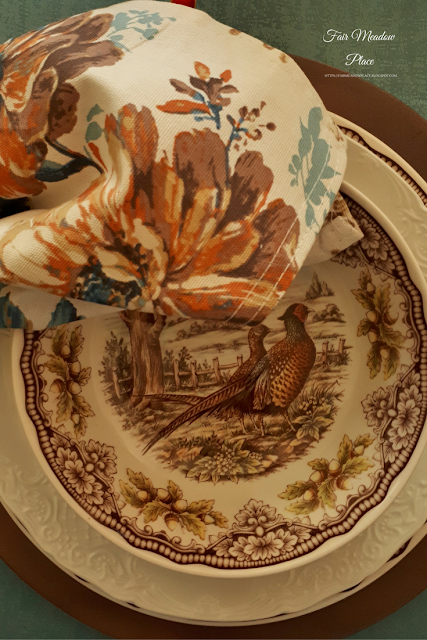
The Pheasant transferware dishes are by The Victorian English Pottery.  I used the dinner plate from this set on top of the charger.
The white plate is also a dinner plate from the pattern Richmond by Johnson Bros.
The salad plate and bowl are from the same Pheasant transferware set.


Set the Table - A Canadian Thanksgiving


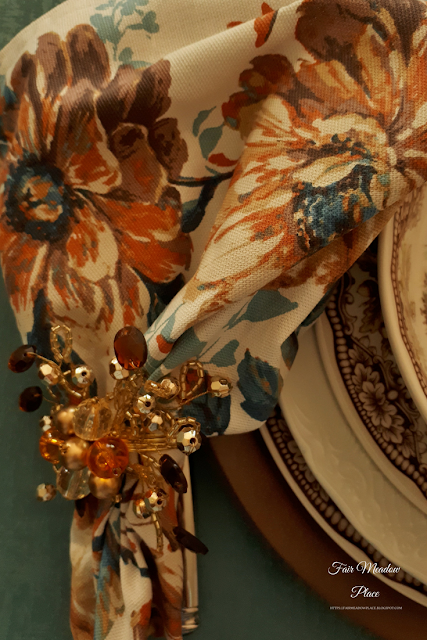
Napkins are by Envogue from Home Sense


Set the Table - A Canadian Thanksging


The amber-coloured glasses were found at a thrift store.


Set the Table - A Canadian Thanksgiving


Cutlery is from Bombay Co.


Set the Table - A Canadian Thanksgiving


Napkin rings are from Pier 1 Imports.


Set the Table - A Canadian Thanksgiving


Set the Table - A Canadian Thanksgiving


Set the Table - A Canadian Thanksgiving


Set the Table - A Canadian Thanksgiving


Set the Table - A Canadian Thanksgiving


I nearly forgot the dessert.  We often have fruit pies and cake made with apples, but, the best dessert and the one I wait for all year is warm pumpkin pie with whipped cream.


Set the Table - A Canadian Thanksgiving


Thank you for stopping by.


We are Linking With...

Universal Flat Metallic Burnished Amber

Flat Burnished Amber


This is a Fair Meadow Place Original Publication


The best way to see our posts is by email subscription.  SUBSCRIBE HERE

 You can find us on PINTEREST, FACEBOOK, GOOGLE + 

It really makes our day when we hear from you so please leave comments below. 

 You can also use the Contact Form to contact us by email. Messages sent by email are private messages that will not be posted on the Blog.

September 07, 2017

Velvet Pumpkins - A Tutorial


This year I have noticed a lot of interest in velvet pumpkins.  I have also seen a few tutorials for these and so I thought I would try making some myself.


The truth is, I used several different fabrics to produce my pumpkins.


I used a stretchy copper coloured lame fabric, a stretchy blue velour fabric, a stretchy green velvet, and a patterned rayon fabric with no stretching capability.

They each had different draping qualities.

I started by cutting circles from the fabric.  I used a round placemat for the largest circle at 16".   I used a dinner plate at 11" and a salad plate at 9 1/2".  These were my templates for each circle.

I cut two circles of blue at 16".


A long heavy needle was used to stitch around the circumference of each circle and about 1/4" in from the cut edge.  I was not too careful about keeping the stitches the same length.  Using a variety of stitch lengths allows for both narrow and thick draping of the fabric.


The thread was pulled up to form a pouch.


About 3/4 cup of dried split peas were used in the bottom of the pouch.  I used less split peas in the smaller pumpkins.


Fiberfill was added and the thread was drawn as tight as possible.
Some more sewing was required in order to pull the circle tighter.
I ran the needle and thread across the circle and picked up the other side and continued back and forth until the hole in the centre was completely closed.


It was starting to look like a pumpkin, but, to give it more definition I squeezed the top and bottom of the pumpkin together and then ran the needle and thread down to the bottom.  The needle was moved over slightly and pushed back up to the top.  This was repeated one more time to make the connection between the top and bottom of the pumpkin stronger.


 By moving the stuffing around it is possible to make the pumpkin's shape change.

I should mention that the finished size of the pumpkin is about half the size of the original circle.


Putting on a stem and embellishing the pumpkin is the fun part.

I have collected pumpkin stems from previous years and let them dry out so it is a matter of sorting through the stems to find the right stem for each pumpkin.


Feathers were used on the two blue pumpkins.


The rayon pumpkin received a bit of trim.  The copper lame and green velvet pumpkins just got stems.

I used E6000 to attach stems and embellishments.


My favourite pumpkin is the green velvet.  I really liked the way the fabric felt and the way it draped.


The blue velour was nice, but bulkier to work with.


The rayon was okay too and I like that it adds a bit of pattern to the mix.

The copper lame worked well too.  It has less body than the other fabrics, but it worked just fine.


This was a fun project and a lot less expensive than the really high priced versions available for sale.  I do think that the expensive versions are quite exquisite, though.  They are just too costly for me. 


Thank you for stopping by.


This is an original Fair Meadow Place Publication.


We are Linking With....


The best way to see our posts is by email subscription.  SUBSCRIBE HERE

You can find us on  PINTERESTFACEBOOKGOOGLE +

It really makes our day when we hear from you so please leave comments below. 

You can also use the Contact Form to contact us by email. Messages sent by email are private messages that will not be posted on the Blog.


Thursday Favorite Things